
Purpose
This procedure explains how to access the Autofill on Subsequent Pages Advance Settings on a Keeper record and configure Autofill behaviour for login forms.
Procedure
1. Open the Keeper Vault
Launch the Keeper Password Manager on your browser extension
Locate the login record you want to modify.
Open the record.
2. Open the Autofill Settings
In the record, locate the Options represented by three dots
Click the Advanced Settings icon (settings icon).
The Advanced Settings panel will appear.
3. Step 3 - Disabling Autofill on Subsequent Pages
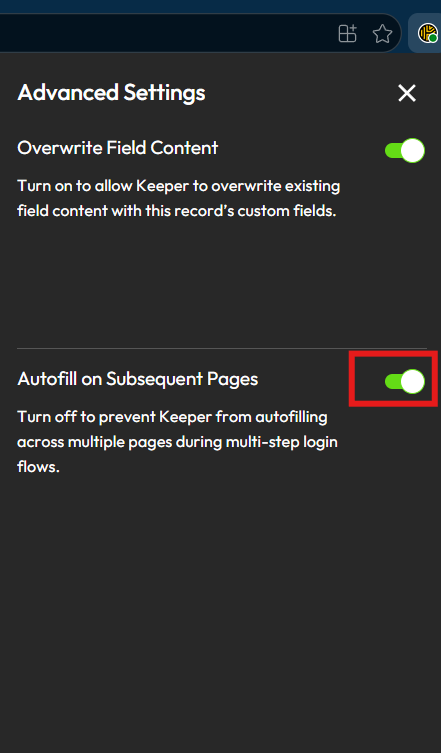
To deactivate click the slider to turn green.
Explanation of Autofill on Subsequent Pages
Autofill on Subsequent Pages
Description
Controls whether Keeper continues auto-filling across multi-step login pages.
Example:
Page 1 → Username
Page 2 → Password
When Enabled
Keeper continues auto-filling credentials across multiple login pages.
It populates page 1 and then populates page 2
Recommended for most modern login systems.
When Disabled
Autofill only works on the first login page.
Keeper will not autofill credentials on the next step.
This means that it populates page 1 and then does not populate page 2. The solution here is to click the Keeper icon in the field or right click to find the password and populate.
Recommended Use
Disable this if:
The website incorrectly fills data on the next page
The login flow breaks due to autofill behavior.